So as I alluded to the other day, I kick started a blog again (yes I know… how quaint and 1990s of me).
I’ve contributed probably to over a dozen different blogs over the years and then have separately run a dozen or so of my own. It’s always varying degrees of fun and frustration depending on which end of the spectrum you are at a given point of time.
So with my current focus on Azure Technical Training with Microsoft (and we’re hiring by the way, all over the world, if you’re interested) I figured I might as well take running a blog a little further and run the entire thing on Azure.
Azure offers many different options for creating your own personal blog and one of them is a free option if you’re going to be very light on the use and traffic. This is a great option if it’s more for just “fun” as a hobby or creative outlet.
Eventually, if you’re marginally successful picking up a following, you’ll need to step up and pay for some of the services.
To get started, you’ll go to the Azure Portal to access your subscription.
On your homepage or via the dashboard, you can go to the search bar and type in WordPress as a simple way to get started.
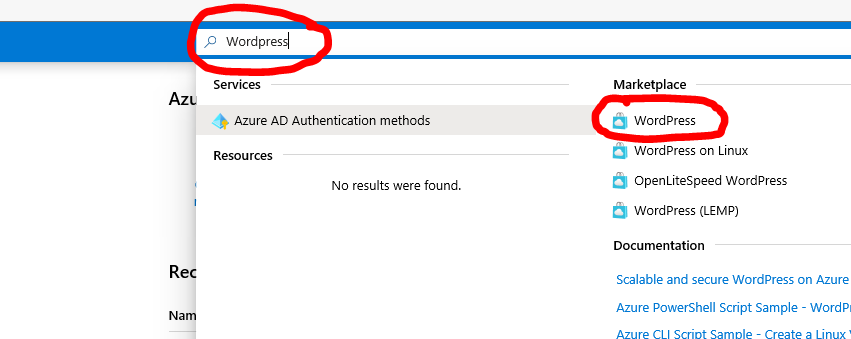
Once you select that option from the Azure Marketplace, you’ll arrive at the APP configuration page.
You’ll give your site a unique address (has to be globally unique) – whatever name you give it will be the default Fully Qualified Domain Name (FQDN) that you’ll use to reach the site (unless you’re going to register a different name).
You’ll set the subscription you’ll use in the next drop down box and then choose to either use an existing Resource Group or Create a new one
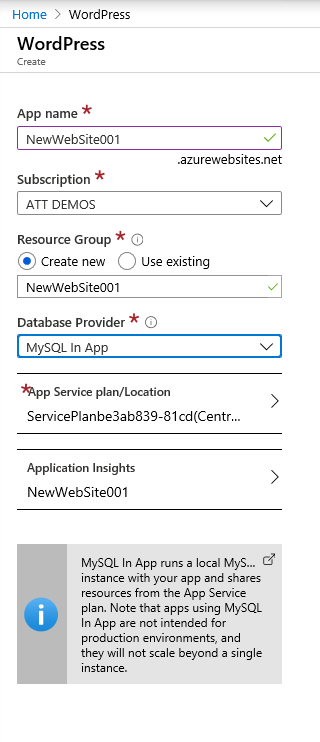
Next, you’ll choose a Database provider; you can select Azure Database for MySQL (which is designed for production environment and will scale to meet demand) or the cheaper option of MySQL in App.
Because I want to try to do this just as a hobby and for fun, I am going with everything I can (at least for now) that is inexpensive or free; with that, I’ll use MySQL in-app.
Next, I’ll choose my App Service Plan and the location and I’ll accept the defaults for Application Insights.
I will also choose the F1 Pricing tier as that is free for 60 minutes a day worth of compute.
(You can view all the tiers and what each one offers and costs HERE.)
Once that’s done, I’ll select CREATE, which will run the validation and deploy the app.
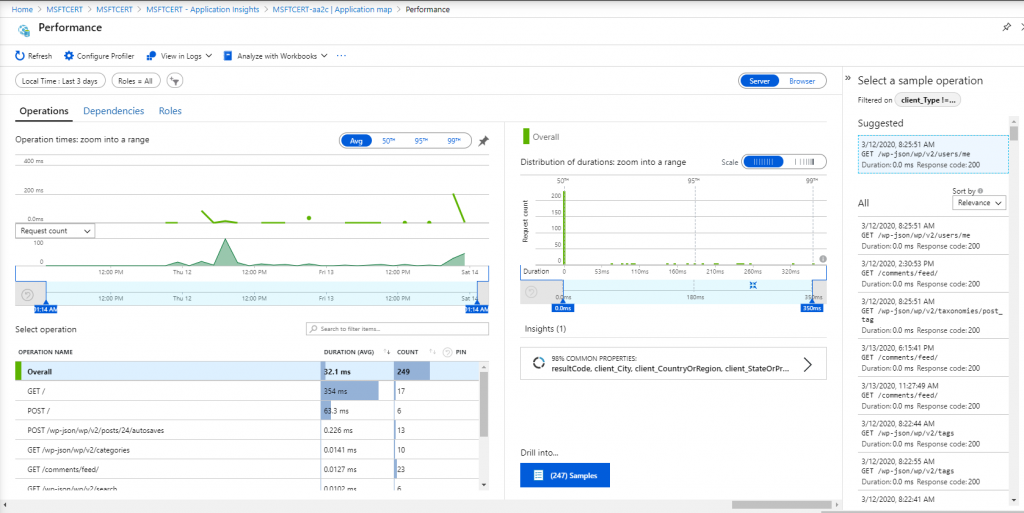
So that’s how I set mine all up… let’s see how we’re doing with that free service over the past three days the site’s been up by reviewing the output on the OVERVIEW dashboard and the APPLICATION INSIGHTS page for the information it supplies.
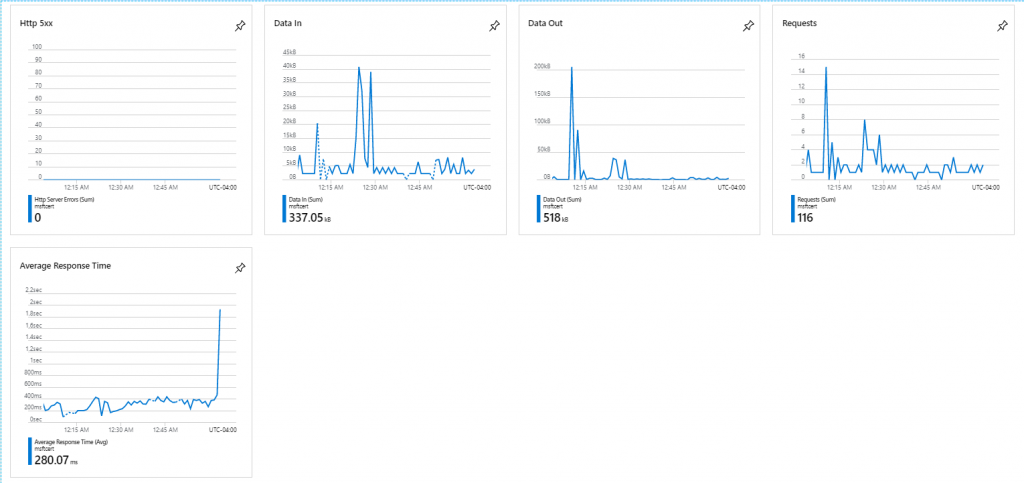
So we can see the results of the past hour on the OVERVIEW page above, but let’s dig in some on the past three days to see how well that F1 Pricing tier has served the new page.
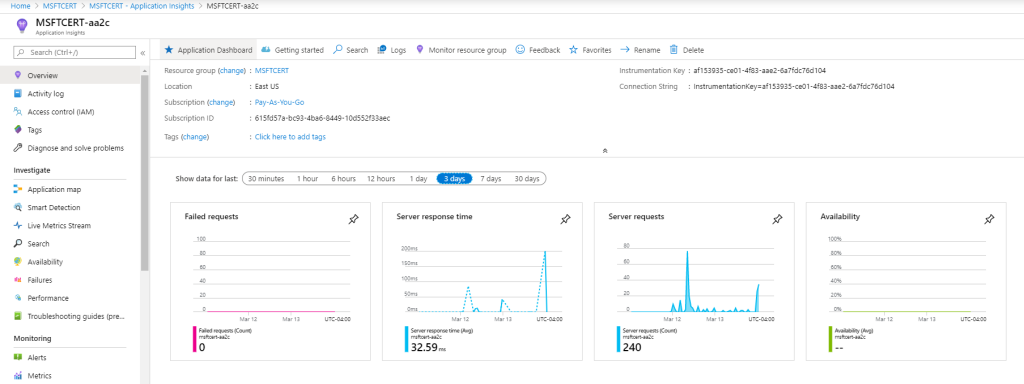
So far, so good – 240 requests, all serviced (no failures), and the worst latency isn’t really all that bad at the peak of 200.85ms.
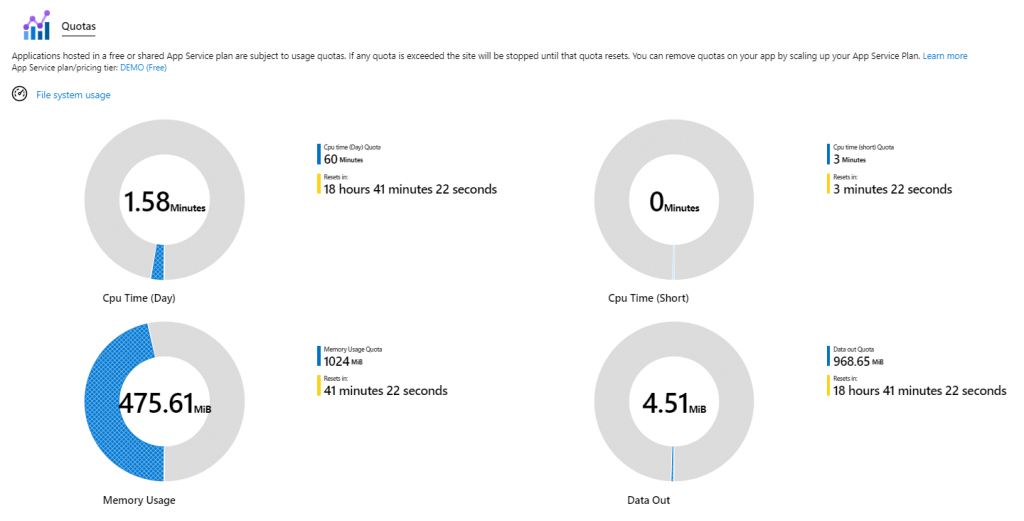
I can also see from my QUOTA view that I have a fair amount of room to grow still under this free plan.
Guess my next task is to try to drive a little more traffic to the blog 😉